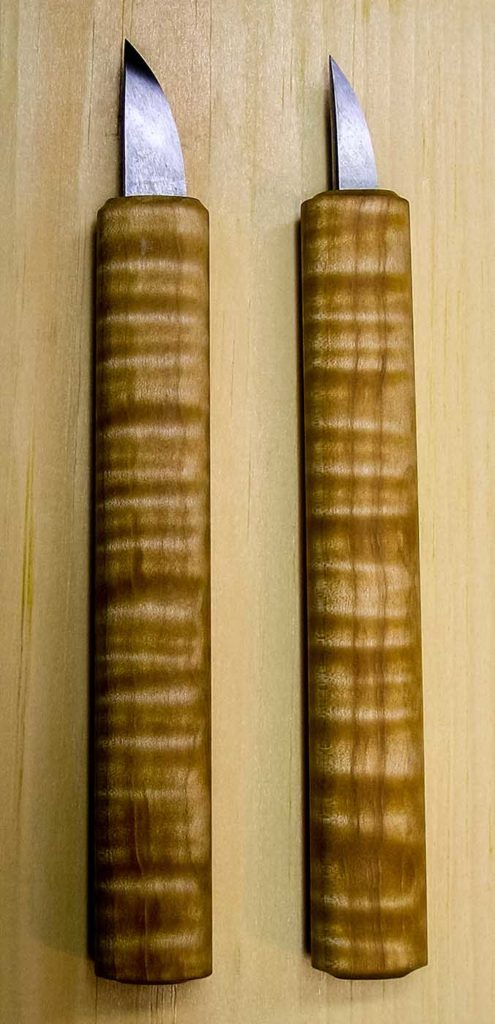
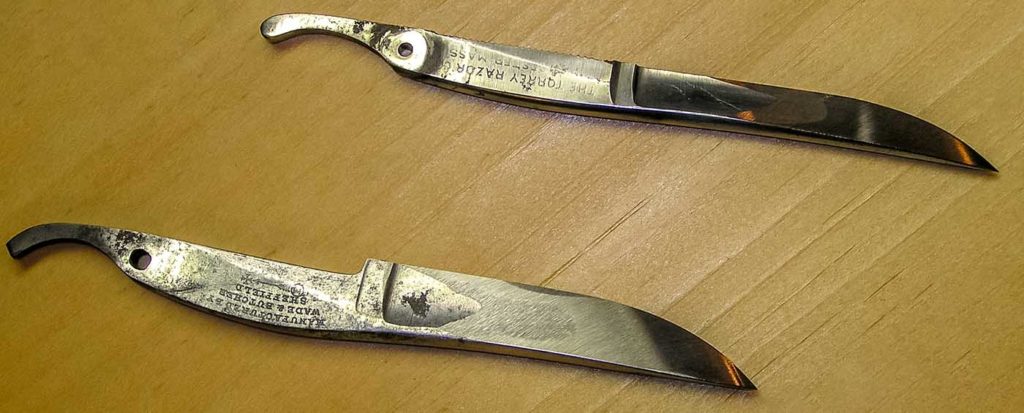
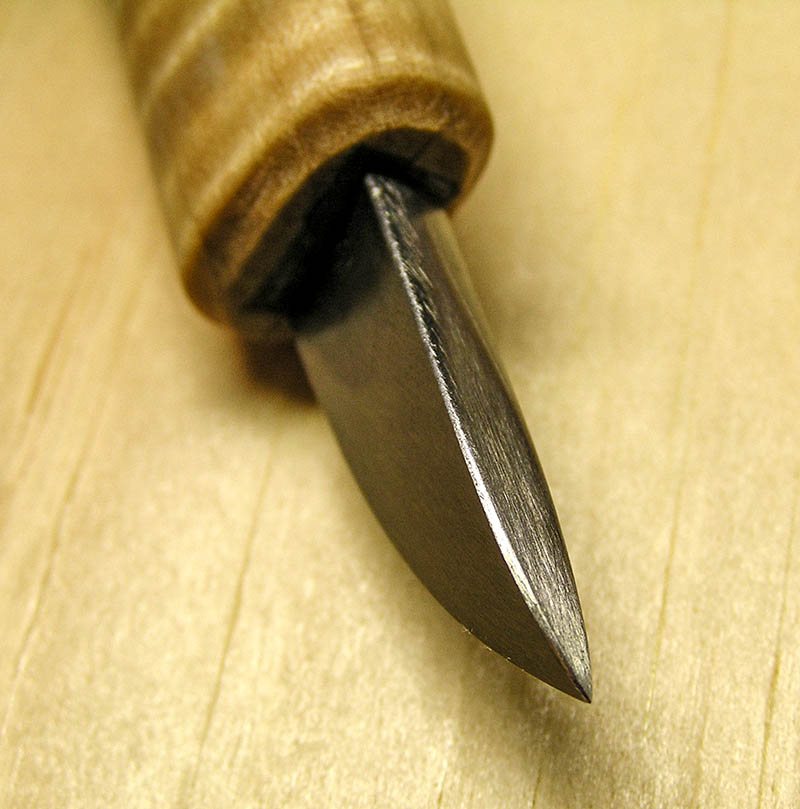
I have had several orders for matched sets of bow maker’s knives. These are traditionally made from old straight razors. 19th-century straight razors were made with excellent quality cast steel and they make wonderful carving tools. The knives described here have blades that vary in cutting angle from ~25 degrees near the handle to ~50 degrees at the tip. Thus, they act as a cutting tool near the handle and scraping tool near the tip. The blade profile is also curved and coupled with the varying blade angle, tends to make the knives cut with less chatter than a straight, single-bevel angle tool.
I can’t take credit for the design of the cutting geometry of these knives. I saw them being used by the very well known French bowmaker, Eric Grandchamps, during the 2002 Oberlin College bowmaking workshop. I copied his design for the blades and modified the handle design a bit so they won’t easily roll off the workbench.
The images and text below show the overall process. Although it takes a few hours, anyone with basic sharpening and woodworking skills can make knives like these.
The straight razors used
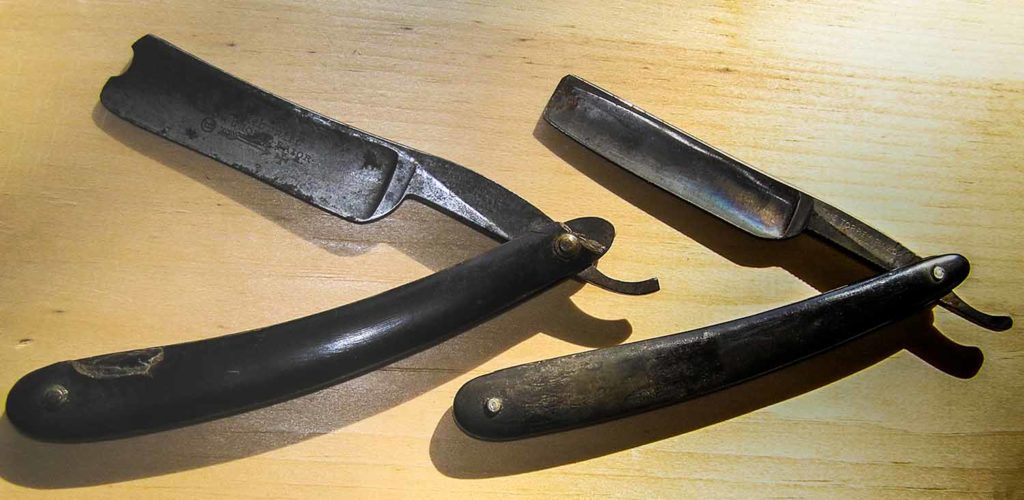
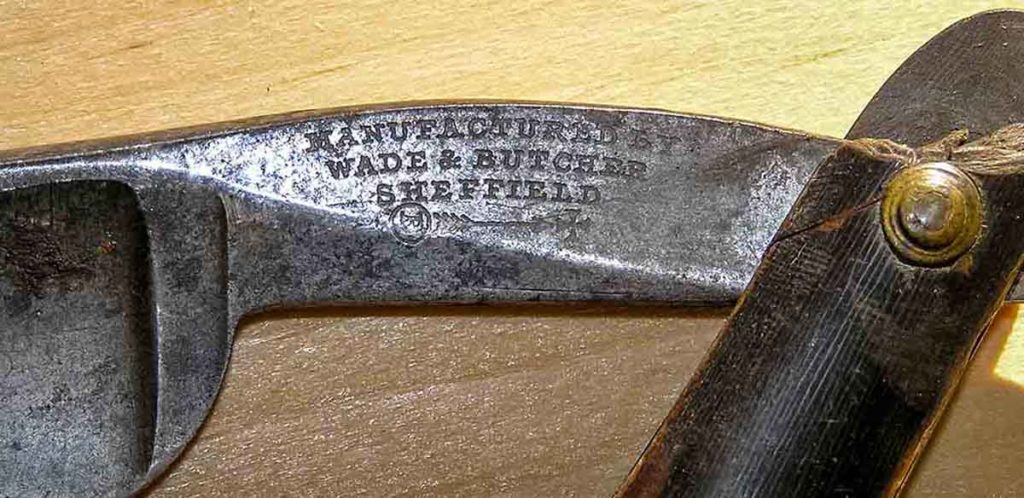
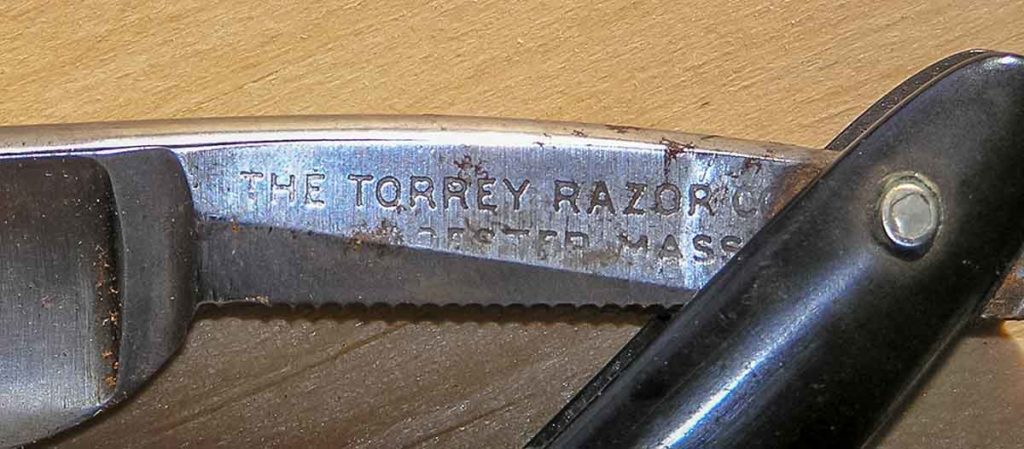
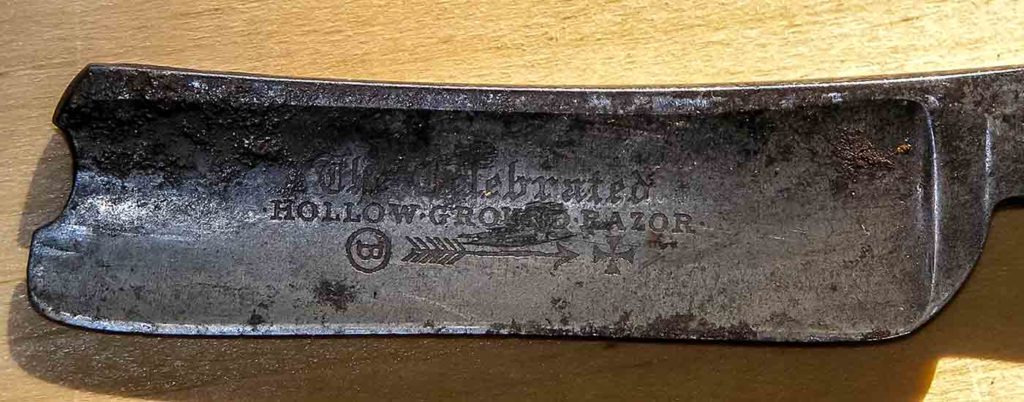
The blade material for these two knives came from two antique straight razors. The firm of Wade and Butcher, Sheffield, England made the thicker bladed razor and the thinner one is a Torrey Razor Co. blade made in Massachusetts. I can usually find razors like these at flea markets or tag sales. Many times, they are pretty rusted and chipped – perfect for being reborn as knives. You first have to file the head of the rivet that holds the blade and drive the pin through the handle to free the blade. Needless to say, these razors can be very sharp, so you have to be careful not to cut yourself before beginning work!
Grinding the blades
The blades are shaped freehand using a combination of high-speed and low-speed grinding. I first rough out the curved profile using a 3600-rpm grinder and friable aluminum-oxide 60-grit wheel. After every 2-3 passes, I stop and cool the blade in water. I don’t want to draw the temper from these razors by overheating while grinding. Better to take it easy and proceed slowly. The sloped sides are ground using the side of the grinding wheel and again going slowly. This is definitely a freehand process with a lot of water quenching.
Once I get the blade shaped to a little less than 1 mm at what will be the cutting edge, I switch to a Tormek slow-speed (90-rpm) wet grinder. Although the Tormek comes with a healthy assortment of very good jigs and attachments, I prefer shape the blades freehand on the perimeter of the wheel. These blades have no real flat edges, so they don’t lend themselves to being held in a jig.
The final shaping is done on 600-grit diamond “stones” made by Ezy-Lap. A coarser stone would cut faster, but all I have are the 600-grit stones. Again, there is not a real flat surface to use a sharpening jig, so I do this final shaping freehand. Basically, a lifting motion while bearing down on the stone produces a blade that gradually varys in bevel angle from ~25 degrees near the handle to about 50 degrees at the tip.
Preparing the stock for the handles
The handles were made of curly maple purchased, in of all places, a now defunct “Builder’s Square” store that was much like a small version of a Home Depot. There happened to be an 8-foot length of beautifully curled maple in the rack with all the rest of the bland, plain grained stuff, so I bought it with the thought that it would some day come in handy. Serendipity, one might say.
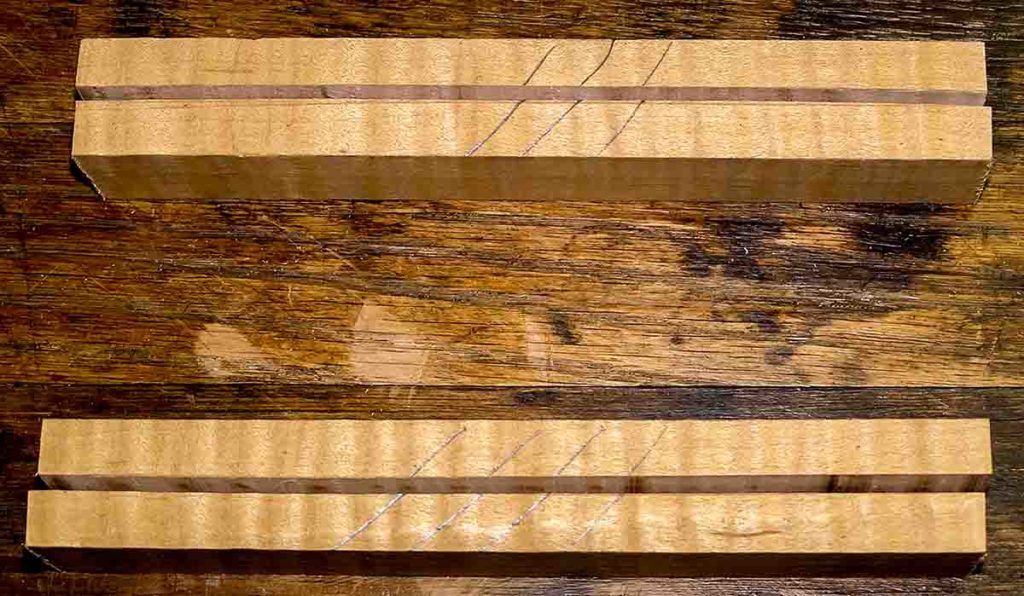
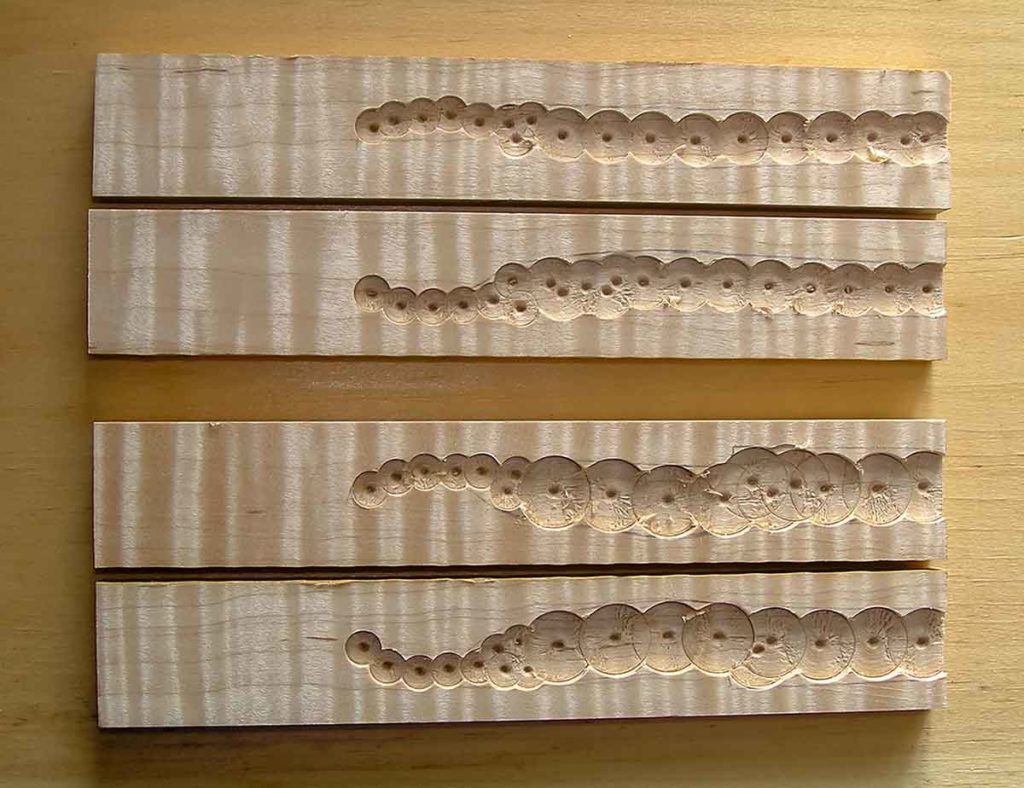
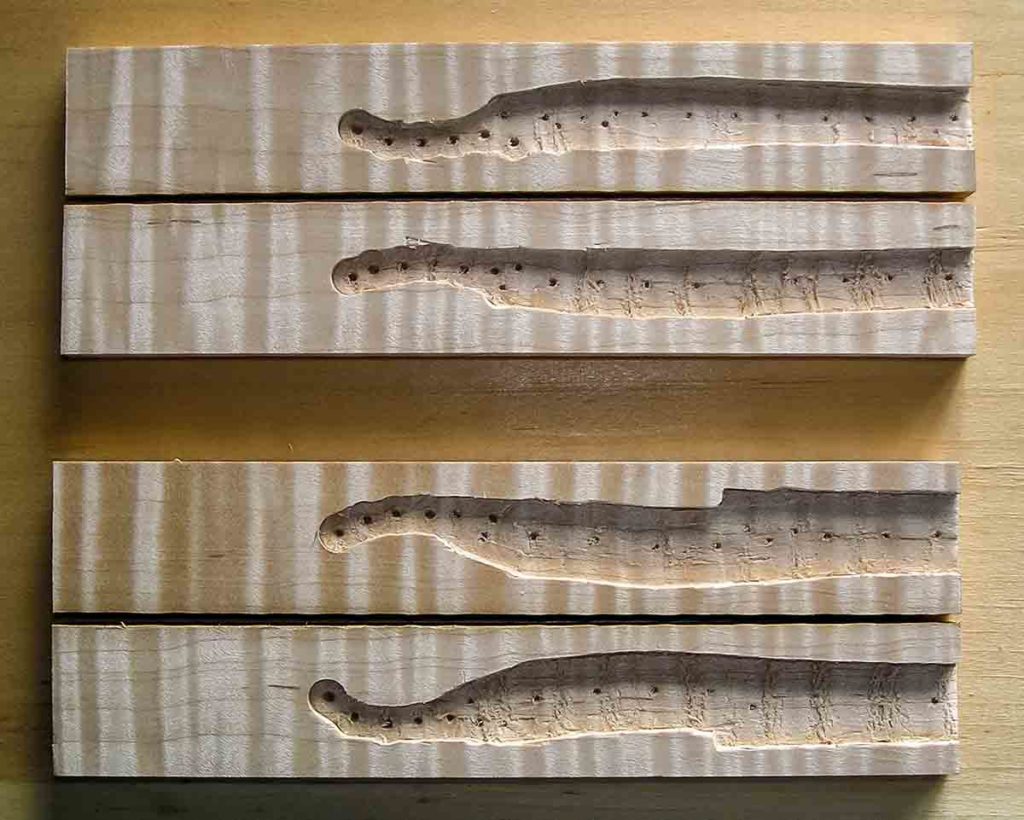
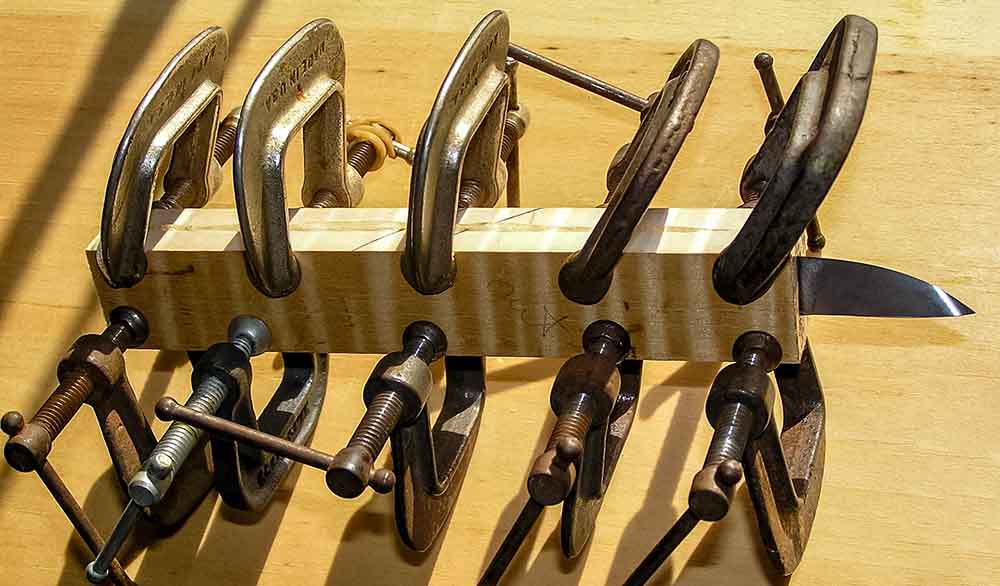
I squared off the two pieces, marked the sides with pencil registration marks, and used my bandsaw to rip each blank into two pieces. After planing the two inner surfaces such that they could be glued back together, I traced out the blade profiles that would need to be excavated in order to bury the knife blade shanks into place. The routing out process begins with a drill press and various diameter flat-bottom cutting Forstner drill bits. A bit of chiseling follows the drilling step and the sides are fully routed out when the two wooden halves and fully enclose the blade shank. I then do a final planing cleanup to make sure the gluing surfaces are true. I then mixed up some 5-minute epoxy, butter up the blade shank as well as both wooden recesses and quickly got (10) C-clamps around the edges of the handle. No need to be careful here since any clamping marks will be later removed when the handle is shaped.
Shaping the handles
The handles were shaped using a Stanley #102 plane with a slightly curved iron. The blades of the knives are very sharp at this point, and learning by past experience, I wrapped heavy packing tape around the blades to prevent cutting myself. Again, the shaping of the handle is freehand, but I do use a digital caliper to gauge the overall dimensions. I held the handle in a bench vise (my bench is fitted with a leg vise), rotating the handle to work on the different sides. The handles are slightly tapered in width; they are ~1 mm narrower at the blade than at the butt end. They are tapered in thickness with the portion behind the blade at ~14 mm thick and the butt end at ~18 mm thick. Both the butt and blade ends are roughly oval but vary in cross section because of the difference in thickness. After shaping with the plane, I use 180 grit sandpaper to round off the plane ridges and finish off with 220 grit. Lastly, I use a knife to cut slightly concave “bevels” at each end.


Final finishing
I fully immersed the knives in a 3:1 mixture of boiled linseed oil and mineral spirits and let them to soak for 2-3 days. After soaking, the excess oil mixture is wiped off and the handles allowed to dry for a few days. The cutting edges are lightly touched up on a fine oilstone and stropped using green Veritas honing compound on a hard leather strop. The knives were done.